How To: Enable RTSP Server on TP-Link Tapo Cameras
Enable RTSP and ONVIF on TP-Link Tapo cameras with step-by-step instructions, example URLs, and security tips for use with VLC, Home Assistant, and Frigate.
Introduction
TP-Link Tapo cameras are an affordable and easy way to get into security cameras. They typically can be powered by USB, use Wi-Fi, and have cloud connectivity if you want it. They also have the ability to enable an RTSP server so you can integrate them into other services like Frigate, Home Assistant, go2rtc, etc.
In this example I will run through the steps of enabling the RTSP on a TP-Link Tapo C100.
Enabling the RTSP Service
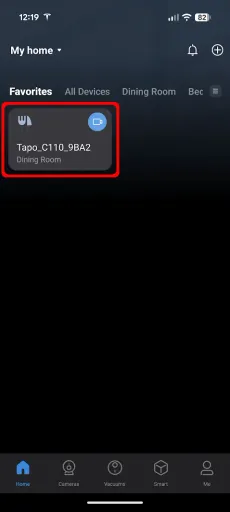
Assuming your camera is already set up and working, open the Tapo app (Android shown).
Once the Tapo app is loaded, tap on the camera you want to configure:
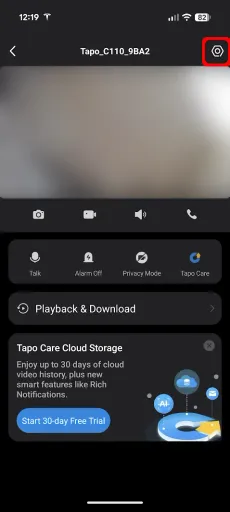
Tap on the hexagon in the top right corner to open the Device Settings:
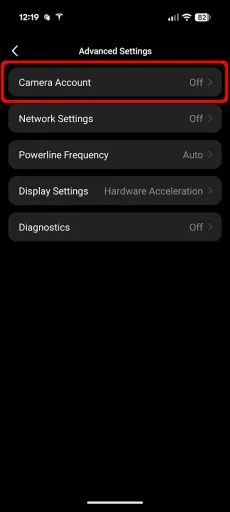
Tap on Advanced Settings:

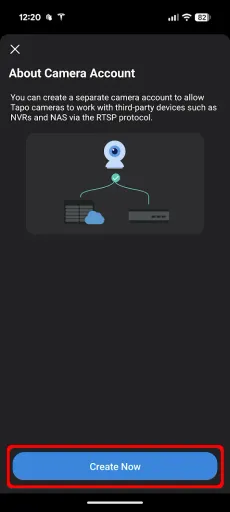
Tap on Camera Account:
Tap Create Now:
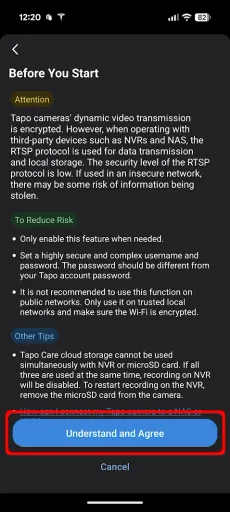
Next, TP-Link warns you about some of the risks with enabling RTSP, if you are happy to proceed tap Understand and Agree:
Next choose a username and strong unique password per camera. I would suggest avoiding using default usernames such as
admin,administrator,tapoadmin, etc. These credentials are separate to your TP-Link ID. Once done, tap Create: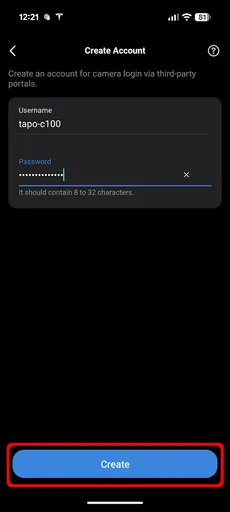
Now we can confirm RTSP is enabled as
Camera Accountis now set toOn: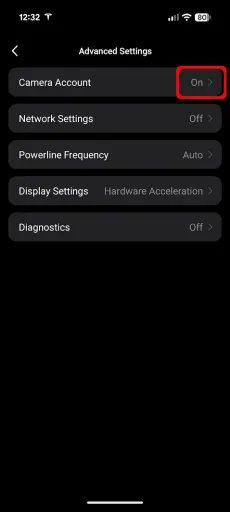
Now we need to know the IP address of our camera, you can find this in Network Settings:

Your IP address will vary depending on your local network setup.
Viewing the Camera Streams
Now the RTSP (TCP/554) and ONVIF (TCP/2020) services are enabled and you can view them using the example links:
- High Quality Stream:
rtsp://<USER>:<PASS>@<CAMERA_IP>:554/stream1 - Low Quality Stream:
rtsp://<USER>:<PASS>@<CAMERA_IP>:554/stream2 - ONVIF:
http://<USER>:<PASS>@<CAMERA_IP>:2020/onvif/device_service
If you are struggling to get the links for your model of camera, check the iSpyConnect Tapo profiles.
Example RTSP stream via VLC:
Considerations
- It is recommended to configure the camera to use a static IP address either via a DHCP reservation or on the camera itself.
- Two-way audio does not work in RTSP mode.
- Tapo cameras do not support the download of snapshots.
The RTSP & ONVIF ports should not be exposed to the public internet. If you want remote connectivity use a service like a VPN or another service (e.g.
Home Assistant) to make the camera feed available. You may also want to consider disabling UPnP on your router to avoid accidental exposure.
You should also consider isolating cameras on an IoT VLAN where feasible.
If you block the camera from accessing the internet this will disable the Cloud connectivity features. You may notice over time the time and date will start to drift. You can allow outbound NTP (UDP/123) to the internet to resolve this.